RTKLIB and Precise Point Positioning For GPSMAP Made Easy
Info sourced from my own experience and from this excellent GitHub page.
Before continuing with the tutorial, install RTKLIB and obtain a CDDIS account.
Step 1 - Recording
Enable RINEX Logging and record a file on your GPSMAP. Instructions for the 67i are as follows:
Ensure the device's firmware is at least version 6.60. Lower versions will NOT work due to a software bug. Firmware can be updated with Garmin Basecamp.
Enable 'RINEX Logging' under Main Menu > Setup > System > RINEX Logging
Turn the device off.
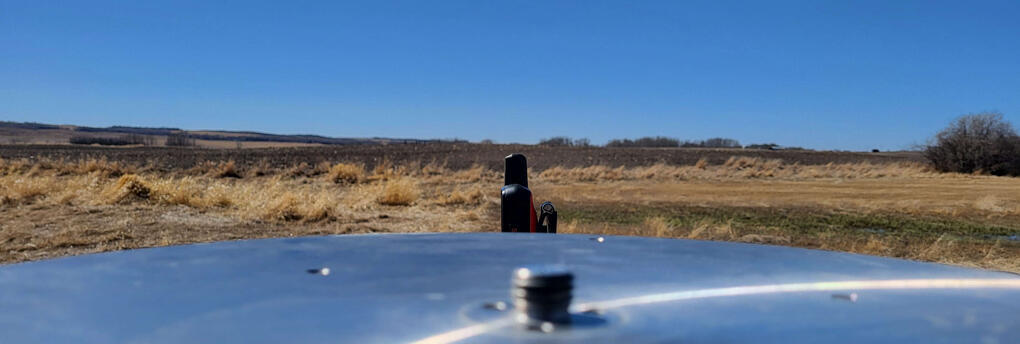
Mount the device in a suitable location such that it is upright and will not move.
Turn on the device.
Wait for about 1-1.25 hours.
Turn off the device.
Connect the device via USB to a computer.
RINEX files are found in the directory 'GPSMAP 67i > Internal Storage > GARMIN > RINEX'
Using the "Date modified" column, find your desired data recording, then copy this file to your computer.
Step 2 - Basic Config
Open the RTKLIB component RTKPOST and configure the Setting1/2 tabs in Options as below:
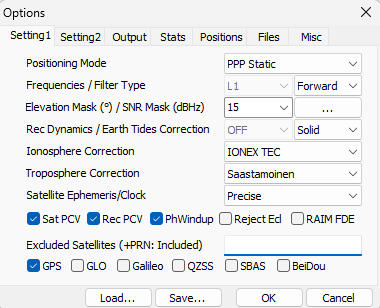
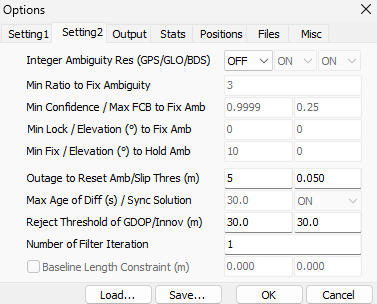
Elevation mask can be adjusted to obtain ideal accuracy; usually values between 5 and 15 are best.
If you're using RTKLIB to contribute elevation data to OpenStreetMap, follow the additional instructions here.
Step 3 - Files
The .YYo file your GPSMAP recorded is just a text file. Open it and find the link at the top.

Download the file at the link. If you prefer using a web browser, just replace everything before /gnss/ with https://cddis.nasa.gov/archive, so for this case the link would be https://cddis.nasa.gov/archive/gnss/data/daily/2024/084/24p/ Now, extract the folder you downloaded. It should have a
.rnxextension.Next, download satellite orbit and clock files from https://cddis.nasa.gov/archive/gnss/products/WWWW You can find the GPS week from this calendar. The files you want are IGS0OPSFIN_YYYYDDD0000_01D_30S_CLK.CLK.gz and IGS0OPSFIN_YYYYDDD0000_01D_15M_ORB.SP3.gz. These gross-looking filenames mean: Produced by the International GNSS Service, as the FINal product for YEAR DAY, covering a period of 01 Days in intervals of 30 Seconds/15 Minutes. If you are processing data within about three weeks of recording, you will have to use the RAPid or ULTra-rapid products. Once you download these files and extract them, you must change the filename extensions to lowercase, or RTKLIB will complain.
Now, download the ionosphere correction file from https://cddis.nasa.gov/archive/gnss/products/ionex/YYYY/DDD The filename should look like IGS0OPSFIN_YYYYDDD0000_01D_02H_GIM.INX.gz Download and extract it, then change the filename extension to
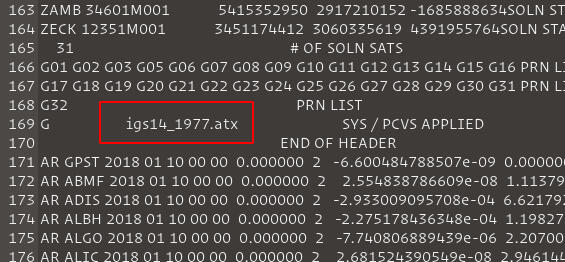
.iFinally, download the antenna phase centre correction file from https://files.igs.org/pub/station/general/pcv_archive/ The name of the file you need here is in the
.clkfile you downloaded earlier, around line 170. All these files are just text, so any text editor should be able to read them.
Image from the GitHub page linked at the start of this page
Step 4 - File Input
If nothing has gone horribly wrong, you should now have six files:
The
.YYo"observation" file that your GPSMAP recordedThe
.rnx"navigation" file you downloaded from CDDISThe
.clk"clock" file you downloaded from CDDISThe
.sp3"ephemeris" file you downloaded from CDDISThe
.i"IONEX" file you downloaded from CDDISThe
.atx"ANTEX" file you downloaded from IGS
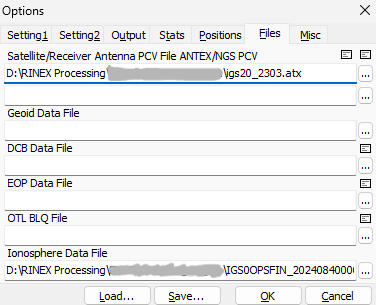
If you have all the right files, but the extensions don't quite match, that's ok! Just change them so they do. The last two files are unique; they need to go into the "Files" tab in RTKPOST as shown below. The .atx file goes in the top slot, and the .i file goes in the bottom slot.
After you've configured the settings as in Step 2 and added these two files, press "OK" to return to the main RTKPOST screen. It should appear as below.

Now you can input the four remaining files. In the top slot, put the .YYo file. In the group of three slots, put the .rnx, .clk, and .sp3 files. Finally, tap the triple dot icon beside the bottom slot to pick a place to put the "solved" or corrected coordinate file.
Step 5 - The Payoff
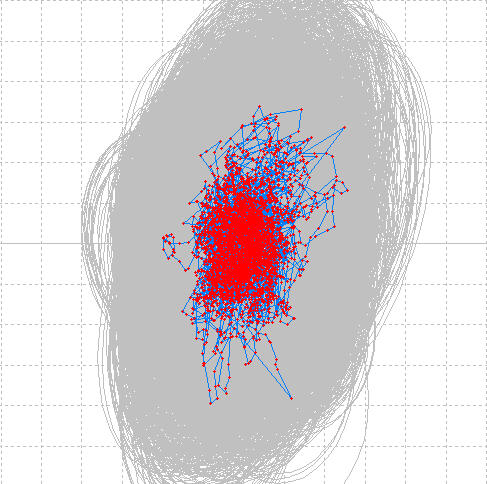
With all the files added, press the "Execute" button to process your files. You can then press "Plot..." to view a graph of the solved position and some statistics, including coordinates, elevation, and precision. If statistics are not showing up, press the gear icon at the top right and toggle "Show Statistics" to "ON". The graph should look something like below:
Extra Config Options for OpenStreetMap Contributors
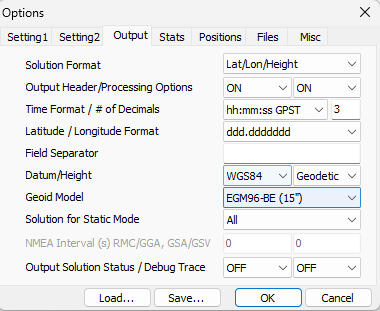
OpenStreetMap uses EGM96 geoid heights in the ele= tag. RTKPOST defaults to outputting heights on an ellipsoidal datum, but it can also natively output to EGM96. This is adjusted in the "Output" tab of the options.
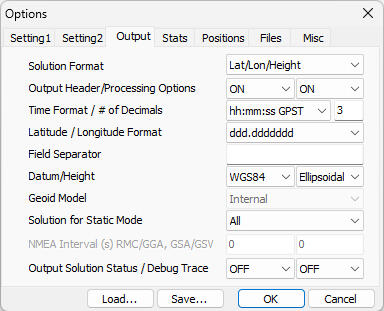
To switch to EGM96, click on "Ellipsoidal" and toggle it to "Geodetic." Then switch the geoid model from "Internal" to "EGM96-BE (15")".